 DE
DEAssign actions and status to remote elements
If you use single elements to design your remote control, you have to add functionality to the remote elements by yourself (This is done automatically when you use widgets).
Assign which device to control and which specific action (e.g. switch on, dim or toggle a lamp) shall be triggered by the element. The same applies to the status. In order to show a status via status icon, the device and the desired status must be assigned.
Add an action
Actions can be triggered with the following remote elements:.
- Button: An action can always be triggered by a button.
- Slider: Actions that contain numerical values (such as volume values or dimming to percent values) can also be triggered via a slider or round slider.
- Colorpicker: Actions that contain colour values can additionally be executed via the colour picker.
In order for an action to be triggered, e.g. when a button is pressed, an action must be assigned to the button in the properties menu on the right. There are different actions are available for selection, which are described in more detail below. 
Overview of all possible actions
- Action: Execute command
- Action: Execute macro
- Action: Switch page
- Action: Refresh page
- Action: Previous page
- Action: Next page
- Action: Send HTTP-Request
- Action: Open pop-up
- Action: show setup
Action: execute command
Available for buttons, sliders or colorpickers depending on the supported functions of the device.
If the action Execute command is selected, you have to specify the desired action according to the setting options offered in the context menu. All the already integrated devices are offered here. These can be selected as source type.
Scenes that exist in the Home App can be selected under the source type device and room scenes. Scenes can then be executed as a command.
If a device is selected as source type, the following further options are offered, which define the action in detail:
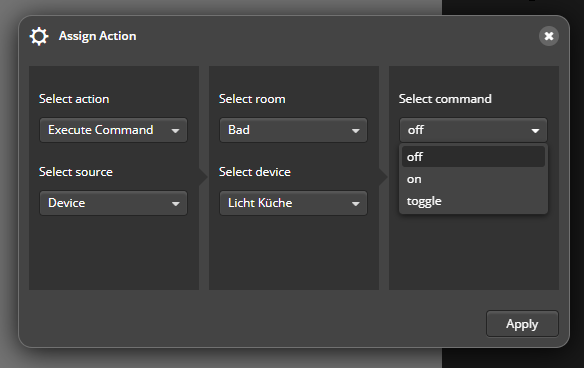
- Select room of your device.
- Select a device or Select a Scene for which a command shall be executed.
- Define the specific command that shall be executed when the button is pressed.
Action: Execute macro
For buttons only.
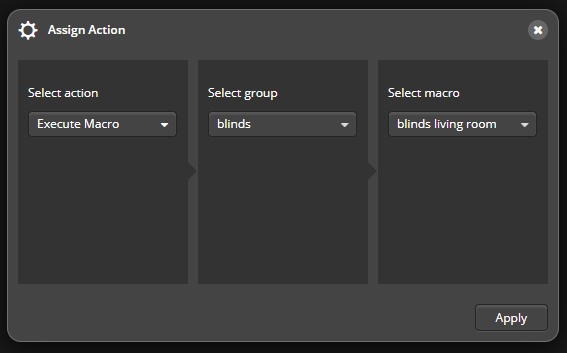
If the action Execute macro has been selected, you can select a macro, which has been created, in the macro editor. The selected macro will be executed when the button is pressed.
Action: Switch page
Only for buttons.
If the action Switch page has been selected for a button, you can use the drop-down menu to assign to which page of the remote you want to navigate. You can use the switch page function to create the navigation of your remote.
Action: Refresh page
Only for buttons.
If you assign the action Refresh page to the button, all statuses integrated on the page are updated.
Action: Previous page
Only for buttons.
If you assign the action Previous page to the button, it will switch to the last opened page.
Important: The page history is only saved as long as the APP is open. If the app is closed, the history will be deleted, so that this function is no longer available after restarting the app.
Action: Next page
Only for buttons.
If you assign the action Next page to the button, it will go to the next page in the page sequence.
Important: The page history is only saved as long as the APP is open.
Action: Send HTTP request
Only for buttons.
If the action HTTP request has been selected for a button, a URL can be entered in the settings menu.
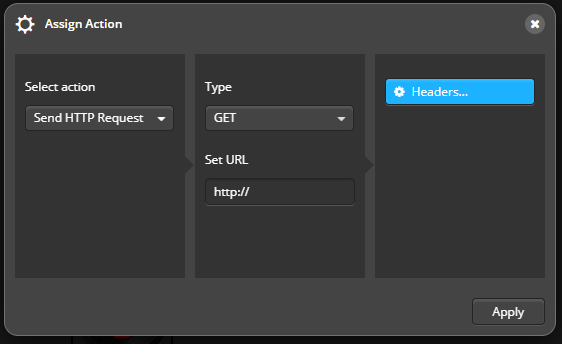
In addition you can select the type GET, POST, PUT or DELETE.
What is this useful for? By sending out a URL using a button, further actions can be triggered, e.g. external web services.
Action: open pop-up
For buttons only.
When the button is pressed, the selected pop-up opens.
Read more: create pop-up
Action: Show setup
If the action Show setup is selected for a button, the app setup opens when the button is pressed.
You can also access the iOS setup menu at any time with a two-finger swipe upwards.
Add a status
If you want to visualize a status with a remote element, you can assign a status to the element in the properties menu on the right.
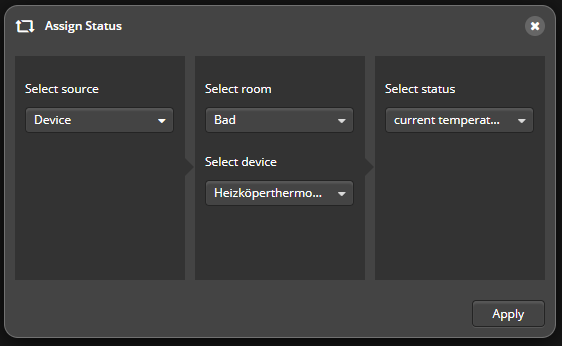
Similar to actions, you must specify which status the element should display. To do this, you can select the following options under Source type:
- Device
- HTTP request
Now use the remaining fields, to select room, device and the exact status that shall be visualized. HTTP requests require further settings, which are explained in detail under Connecting Devices via HTTP Request.
Status graphics
For image and button elements you can define that the icons automatically show the current status of the unit and change appropriately when the status changes. How this works in detail can be found in Graphic with status display.
Status rules for texts and graphics
In addition, you can create status rules for text fields as well as for images and buttons, e.g. to use your own status graphics or to adjust the displayed status texts.
Continue reading:
Create status rules for graphics.